
Before the release of the iPhone 11, for many years Apple was scolded for the fact that it was impossible to get more or less decent photos on the iPhone camera in low light conditions. It really was. Any attempt to take a photo at night , in the absence of at least some decent lighting, resulted in a mess of pixels and a dark background. Many people were very upset by this situation. Indeed, at the same time, Android smartphone manufacturers were pumping night shooting from device to device.
But with the release of the iPhone 11, everything has changed. Since that generation, every new Apple smartphone has been given a night mode, and it was possible to take very decent photos in low light conditions. Unfortunately, not all iPhone owners know how to turn it on. We tell you in detail about the night mode and how to use it correctly.
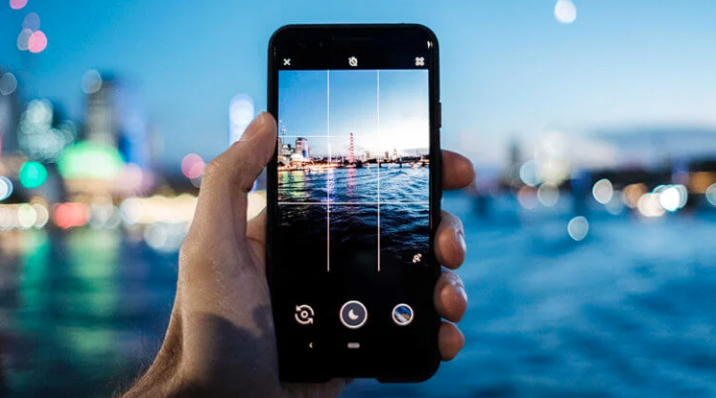
Night mode on iPhone
Initially, when the night mode first appeared in iPhones, Apple planned to make it work as inconspicuously as possible. There were no additional settings and indicators on the screen. Only from the final photo it was clear whether the algorithms worked or not. But there are situations when a dark shot is needed, and users began to require the company to turn it off or adjust the response time. These settings appeared in future versions of iOS .
Starting with iPhone 11, all smartphones with Face ID use at least two cameras in the main module. But Apple did not immediately give the opportunity to use night mode on them. Here is a list of iPhones that support night mode on the main camera:
- iPhone 11.
- iPhone 11 Pro.
- iPhone 11 Pro Max .
- iPhone 12 mini.
- iPhone 12.
- iPhone 12 Pro.
- iPhone 12 Pro Max.
- iPhone 13 mini.
- iPhone 13.
- iPhone 13 Pro.
- iPhone 13 Pro Max.
- iPhone 14 Plus.
- iPhone 14.
- iPhone 14 Pro.
- iPhone 14 Pro Max.
If you want to shoot some kind of landscape at super wide or take a selfie in low light conditions , then make sure you have one of the following models:
- iPhone 12 mini.
- iPhone 12.
- iPhone 12 Pro.
- iPhone 12 Pro Max.
- iPhone 13 mini.
- iPhone 13.
- iPhone 13 Pro.
- iPhone 13 Pro Max.
- iPhone 14 Plus.
- iPhone 14.
- iPhone 14 Pro.
- iPhone 14 Pro Max.
The iPhone 11 line did not get night mode in the super wide-angle lens and front camera. But if you want to use optical zoom with a telephoto lens, then only the following iPhones can do this:
- iPhone 13 mini.
- iPhone 13.
- iPhone 13 Pro.
- iPhone 13 Pro Max.
- iPhone 14 Plus.
- iPhone 14.
- iPhone 14 Pro.
- iPhone 14 Pro Max.
As you can see, from generation to generation, night mode has appeared in all the cameras installed in the iPhone. Plus, starting with the iPhone 12, it became possible to take portraits in low light conditions .
How to turn on night mode on iPhone
To use the night mode in the iPhone camera , you must first make sure that the selected lens supports such shooting on your model. After that, do the following:
- Open the camera. In low light conditions, night mode will start automatically.
- A yellow button with a moon will appear in the upper right corner.
- If the night mode does not turn on, then by pressing this button you can start it.
- The number next to the moon icon indicates the amount of time that elapses before the shutter is released.
- By pressing this button, you can increase the time or even set the timer to the “Auto” mode.
When shooting in night mode, it is imperative to keep the camera still. Otherwise, the final image may be very blurred. If the iPhone detects motion while taking a picture, a crosshair will appear in the frame. It will need to be aligned to reduce blur and improve image quality.
If you want to shoot a portrait in low light conditions , then after starting the camera, simply switch to portrait mode and follow all the same steps as in normal shooting.
Night mode on iPhone
If you think that the night mode on the iPhone is just a toy that will not give you any decent results, then look at the photos that users get. Yes, it was not without additional equipment, such as a tripod, and in some situations color correction was done through the standard “Photo” application on iPhone . But it is available to anyone, even the most inexperienced user.
The main thing is just to choose the right place for shooting and to catch a good shot will not be any problem. As in the situation with the bridge. It seems that this is a professional camera, but the picture was taken only on a smartphone.
Or look at this photo with a super wide-angle camera. It can be seen that Apple has done an excellent job and brought shooting in low light conditions to a fundamentally different level.
A panoramic view of the city in general can be safely put on the wallpaper. No soap and blurry pixels. If you want to get a similar result, be sure to use a tripod, and you will succeed.